
 Careers
Create a Static Block And Call It From .phtml File in Magento

There are different ways of adding a static block to your CMS page in Magento. We all know Magento offers the following handles for CMS pages:
- Homepage and 404-page handle
- Handle for all CMS pages
To display the block only on home page, we will use homage handle on our local.xml file. If we need to display the same static block on all CMS pages then we will use a handle for all CMS pages respectively.
Let me first explain the CMS static block for those who are unfamiliar with it. The static block is a powerful feature in Magento admin, and it allows the admin to control chunks of HTML and CSS that can be displayed throughout your website. They are perfect for seasonal banners, displaying charts, graphics and much more.
What is the need of these blocks while my developer can work it out?
Your Magento website must be configurable as much as possible so that anyone with a few CSS and HTML chunks can work on different parts of the site. Easily manage banners, images, text and seasonal sales. While your developer can focus on more crucial tasks.
So, let’s begin with creating a static block and showing it in the CMS Page:
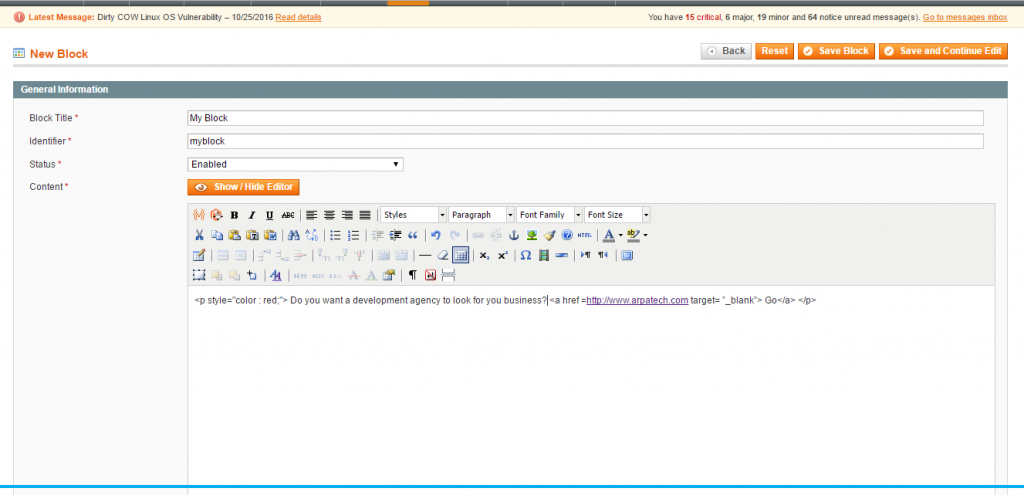
From your admin panel, Navigate to CMS-> Static Blocks
Click on Add New Block
Enter the Block Title, ‘Identifier‘ and set the status to Enable.
Block Title: The Title Of Block That You Will See.
Identifier: The identifier of the block that will be used to call it to CMS page.
Click on show hide editor and add any HTML you like. You can add any image, text or links that you want.
For this, we will write a simple text that will be linked to a page.
Write the following code:
<p style=”color: red;”>I am a red Block <a href =http://www.arpatech.com target= ”_blank”> Go </a> </p>
Click to Save Block
Now from your server navigate to
\app\design\frontend\ theme\template\page
Note: Instead of theme, the name of folder will be related to your theme.
In the following folder, find 2cloumns-left.phtml file and use any of your preferred editor to edit it. For this tutorial we are using 2cloumns-left design. If you are using some other design then edit the related file.
Open the file and find the required div class in which you have to attach the block. The best way to check the class name is:
Go to you page.
Right click on anywhere you want to show the static block.
Select Inspect Element.
A code window will open. See the desired div in which you want to attach the block.
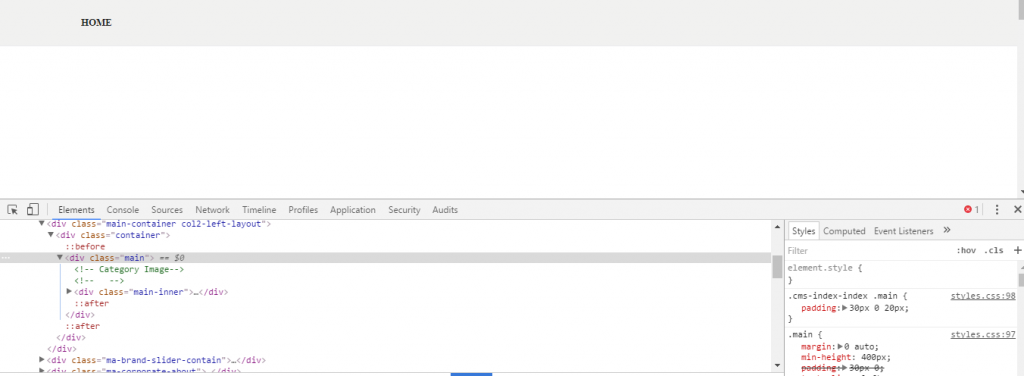
Now go back to the file and find the required div. In my case its <div class=”main”>
In my case its <div class=”main”>
Add the following line right under the div:
<?php echo $this->getLayout()->createBlock(‘cms/block’)->setBlockId(‘myblock’)->toHtml() ?>

I have included the block under <div class=”main”>. You can place it anywhere according to your need.
Open your page. You can see the new block listed. Now you can create your customize blocks with images, texts and much more. I hope you enjoyed the block.
Feel free to ask us anything regarding the tutorial in the comments section below.
Learn how to display products from a specific category in Magento.
Latest posts by Moiz Khan (see all)
- How to Use AI to Enhance your SEO Strategies? - August 31, 2023
- What You Need to Know About Test Automation in DevOps - August 30, 2023
- 6 Cloud Computing Challenges That Businesses Need to Be Aware of - August 22, 2023


