Latest Blogs
Software Development
Ramsha Khan
Jul 29, 2026
Can AI Accelerate ESG Compliance in the Logistics Industry?
Read More...
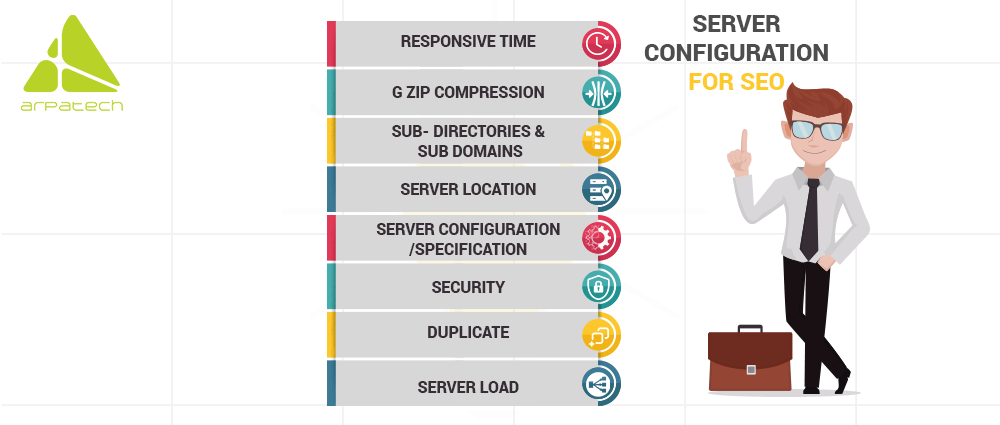
Server Configuration For SEO
This article will prove to be an essential guide for the SEO beginners who assign to perform onsite activities. Before starting any onsite SEO activity, it really matters that your practical knowledge on how to achieve to tweak. The site should have effective SEO and getting fruitful results from such website. One needs to identify the website’s server to be competent to perform such activity and its scripting format and technologies used for its development.
One should know whether the website server is using Apache or Microsoft IIS? PHP, ASP, or Java. This action will explain the SEO why one should need to know about the server, and even how to find it out which it is. Tweaking the website needs some expertise regarding the web server. It means scripting formation to use in it so that the best SEO results can be achieved.
Obviously, if one entirely contented functioning with PHP on Apache web servers. Thus, it has no awareness of how to use ASP.NET on a Windows server. Then, one should not consent any onsite SEO activity for a Microsoft based web domain for fruitful results. It means unsafe to perform an onsite activity on any website. It remains beyond one’s competences because it might harm the existing constant setup of the domain. One will remain responsible for the occurred damages.
One needs to examine the most significant steps involved to identify the web server which is used by any web domain. If one has an Apache user and wish to practice .htaccess to perform approximate redirects or need to rewrite URL. It will won’t work with IIS. Also, if one feels further familiar at functioning with Microsoft IIS servers than Apache. Then, it will surely become necessary to check first. If the web domain on which onsite SEO activity will perform its best on a Microsoft based server.
This technique provides the fastest way to identify if the server is using Apache or Microsoft IIS. But, it needs to note that it does not precisely offer the web server facts every time. However, it means ideal for checking. If it fails to recognize the web server exactly, one should move on to try the another method to achieve best results.
There is something very essential, one should need to be familiar with is the scripting language used by the website i.e. PHP, JSP, VB.NET, C#, etc. Evidently, if one finds the website to be entirely static and is not employing any database. Then, it confirms that it is using .html. There remains several commercial websites running on the Internet and are using a precise scripting technology all over.
One thing to endure in mind that ASP.NET is not any scripting language at all. But, it surely can mean to play a part of the greater Microsoft .NET framework. Having familiar with that tool, the most corporate languages used are C# and VB.NET. Even, there exists several other techniques which can utilize for identifying the scripting language. It used by the domain for attaining effective SEO results on such website.
It is the fastest technique, but it will not always conceal the scripting language for the most part if the URL is rewritten, which actually eliminates the file extension. At this stage, simply go to the website and inspect its URL. If the file extension is observed to be as .php, then the website is running on the PHP language script.
While, if the website is practicing .aspx, then it is surely running on ASP.NET. If the website observes with the file extension as .jsp, then it is running on Java server pages. To perform this check is to move to the home page immediately, and then check it out the source code. Search it out for a string such as PHP, aspx or jsp in the URL / href value of the hyperlinks. So, after identifying the file extension test, the scripting language of the website is clearly known and it will surely supportable while performing the SEO on it and getting fruitful results as well.
Saima Naz
Sep 29, 2017

Benefits of Using Mean Stack For Web Development
In this recent era, lots of development technologies have been introduced from time to time. They offer unbelievable services and fulfilling growing demands of digital renovation across the world. Among such technologies; MEAN STACK is something one of them that gets listed as the greatest technology. It utilizes for developing top mobile apps. Today, MEAN Stack gets employed by leading mobile app development giants across the world.
MongoDB: M describes its open source as MongoDB which means a free and cross-platform database used for JavaScript. It utilizes JSON document focused on style that serves entire data representation. So, the reason behind selecting this technology means to restrict us to fair single language-JavaScript for the entire app development.
ExpressJS : E represents ExpressJS which represents one of the utmost dynamic tools; used for developing actual functioning mobile and web applications. So, it provides the negligible framework used for web development as Node.js. Yet, it functions quite enormous and even possible to design entire website simply using Node.js and Express.js. This combination empowers us to design even software on the server-side. It means Node.js becomes really vital and Express.js supports in publishing the app on web domain.
AngularJS: A defines AngularJS which means it is a front-end JS framework that outspreads HTML along with some more new characteristics. It recognizes now widely and utilized in developing client-side apps with integrated code and a data required User Interface. It determines categorically ideal and easy to learn tool for developing Single Page Applications.
Node.js : N elaborates Node.js as a great prevailing, open source and cross-platform. It supports JavaScript-based run-time framework specially designed on Google Chrome’s JSV8 engine. It implements through the worldwide developers as it provides a free platform that combines with ExpressJS to fulfill application development.
As MEAN Stack means a completely free and open-source platform supporting the JavaScript software stack. It is providing facilities in designing websites and web applications. The MEAN Stack developers try their best to implement incredible features to use in across app and web development projects. Therefore, the developers also find the MEAN stack as a great worth, as its applications. They mean capable for writing in a single language for both either at client side or server-side.

Precisely, the noteworthy features can cover across any code with JavaScript as the mutual denominator for the mixed technologies in the MEAN stack. So, the exchanging between client and server code turns into easier with the MEAN stack as JavaScript is quite supportive in both the browser and on the server as well. Although, the MEAN Stack provides efficiency through MongoDB that offers an additional flexibility and a cooperative layer for storing data. While, Node.js supports an efficient nexus for running server and Express.js provides assistance to design your websites. On the client side, AngularJS serves an ideal way to enhance cooperative functions and AJAX-driven rich components. Another significant benefit of this ideal technology means that MEAN can find an independent platform. It plays the courteous part with both Linux and Windows operating systems alike.
MEAN Stack is defining to the greatest web development tool that writes entire code in JavaScript. Thus, any single project can be easily planned and designed through a very easy tool. Obviously, this makes it a model and classic option for creating real-time web apps. Also, it is using Single Page Applications and the web pages will not require being refreshed for each server request, as different traditional web apps need. Finally, developers find each technology in the MEAN Stack to be free and open-source. The worldwide community of MEAN Developers contributes to further new developments and also the upgrades of the software version.
Saima Naz
Sep 29, 2017
Give 3D Parallax Effect to the 2D Images Using Depth Ma...
3D Parallax effect if used correctly can add cool interactivity to your website that can grab your visitor’s attention. Therefore, some certain websites that have done excellent implementation of mouse following parallax effect. In this tutorial, we are going to replicate such effects.
Traditionally, a photograph used on which layers of elements are added and on mouse movement to create such effects. These different layers move with different speeds giving the illusion of depth. As, you can see in the example below, the scene divided into multiple layers. The layer that will move in slower speed and cover shorter distance will give the effect of being nearer to the observer.
Our client at Arpatech demanded to have such effects. But here’s the catch; it has applied on a real life photograph of a room like below.
Such complex scenery would require precise cutting of objects through Photoshop and then to make multiple layers out of them. Still, it would not look natural as the scene have not much distinct elements to play with. The most object images are blending with one another. Even, if we use the layers method, we will end up making the landing page heavy as the layers would be in PNG format due to the need of transparency. With the new method JPGs can be used, significantly reducing the load time of the page.
By the end of the tutorial you will be able to achieve this result:
Pretty cool, considering that it can achieve in a matter of minutes starting from just a normal 2d image.
The secret sauce behind it is the depth map. Apple uses this technique to create stunning portrait mode photos. It replicates the blur background effect of big lens cameras like DSLRs. What depth map do to provide distant information of each pixel in the photograph? iPhone 7 calculate the distance through the dual camera setup.
Luckily, we can create our own depth map using our own perception and a single Photoshop brush. Let’s get started:
To create a depth map, first you need to understand how depth maps work. It adds distance information to a 2d image and it uses only the shades of black. The darker the black one becomes the further away. So, it belongs in the scene and the lighter the black is the nearer it belongs. Precisely, complete white color means that the object is the nearest.
In the above image, the left one is actual RGB image and the right one is its depth map. Therefore, we can see the petals that are in lighter tone and the objects are distancing the tone of them are getting darker. In 3D terms, the tone of the color is representing the z-axis information of pixels.
2) Create a new layer, fill it black and turn down the layer opacity to around 50% so you can see the original image below.
3) Turn down the Hardness of brush to 0% and start painting over on the black fill layer. Paint the objects with light tone that are nearer and paint the objects with dark tone that are further.
4) Turn up the opacity of the painted layer to 100% so you can see the final result.
It doesn’t look great. But, it gets the job done. Hence, we deliberately don’t have to do with the edges. It has shifted outwards to give the best result. Now, you save the file as jpg and make sure you save the same dimensions as the original image.
To interpret the depth map, we are using pixi.js library’s Displacement Filtre.
“<script src='https://cdnjs.cloudflare.com/ajax/libs/pixi.js/4.5.0/pixi.min.js'></script>”
Here is the complete code. Feel free to play with the values to adjust the effect according to your liking.
<!DOCTYPE html>
<html >
<head>
  <meta charset="UTF-8">
  <title>Displacement mapping with 2d Face</title>
  <meta name="viewport" content="width=device-width, initial-scale=1.0">


     <style>
body {
    background: black;
    color: #ccee99;
    text-align: center;
    position: fixed;
}

#wrap {
    border: 0px solid #333;
    width:100%;
}

#images img {
    width: 100px;
    height: auto;
}
</style>


</head>

<body>
  <div id="wrap">
</div>
  <script src='https://cdnjs.cloudflare.com/ajax/libs/pixi.js/4.5.0/pixi.min.js'></script>
<script>
function resize() {
    if (window.innerWidth / window.innerHeight >= ratio) {
        var w = window.innerHeight * ratio;
        var h = window.innerHeight;
    } else {
        var w = window.innerWidth;
        var h = window.innerWidth / ratio;
    }
    renderer.view.style.width = w + 'px';
    renderer.view.style.height = h + 'px';
}
window.onresize = resize;
  </script>
    <script>
     w=window.innerWidth, h = window.innerHeight;
var renderer = new PIXI.WebGLRenderer(w, h);
var cOutput = document.getElementById('wrap');
cOutput.appendChild(renderer.view);

var stage = new PIXI.Container();
var container = new PIXI.Container();
var foreground = new PIXI.Container();
stage.addChild(container);
stage.addChild(foreground);

var f;
var fg;
var mousex = w/2, mousey = h/2;
var ploader = new PIXI.loaders.Loader();

function init(){
  console.log('dasdsdasd');
  ploader.add('fg', 'Original.jpg'); //insert Orignal 2d Image Here
  ploader.add('depth', 'DepthMap.jpg'); //insert Depth Map Here

  ploader.once('complete', startMagic);
  // Begin loading -
  ploader.load();
}

function startMagic() {
  fg = new PIXI.Sprite(ploader.resources.fg.texture);

  foreground.addChild(fg);

  d = new PIXI.Sprite(ploader.resources.depth.texture);
    f = new PIXI.filters.DisplacementFilter(d, 0);
    fg.filters = [f];
    window.onmousemove = function(e) {
      mousex = e.clientX;
      mousey = e.clientY;
    };
  animate();
}


function animate() {
console.log('aaaaaaaaaa');
  f.scale.x = (window.innerWidth/2 - mousex) / 79;
  f.scale.y = (window.innerHeight/2 - mousey) / 79;
  fg.addChild(d);
  d.renderable=false;

  renderer.render(stage);
  requestAnimationFrame(animate);
}

// Start -
init();

    </script>

</body>
</html>
Now, change the original.jpg with the filename of your original 2d image file. Change depthmap.jpg with your newly created depth map.
See the Pen Mouse Follow Parallax Effect Using Depth Map by @fatik on CodePen.
Using this method you can give subtle 3d parallax effect to 2d images in no time without running into much complexities. Thanks to Pixi library, the animations are very smooth.
Saima Naz
Aug 3, 2017

DevOps Trends to Watch in 2017
Since, we have witnessed that 2016 passed greatly. A large number of technologies and trends get introduced in the past years. Like, Docker v1.12 released and AWS got some powerful instances types. Moreover, the hybrid cloud (both private and public) became the first choice for enterprises and many more trends.
Here, I am going to share your some latest DevOps trends of 2017 in this blog post.
But, let me give you an introduction to DevOps. DevOps actually serves the collaboration of Development and Operation team to work together. Like, it becomes one unit rather than working the old traditional way. Although, the Agile methodology did great where the development and operation team worked individually. So, it serves to develop any software or fulfill the services.
Ideally, the old traditional method consume time. It lacked the understanding between the team of software development, leading it to customer dissatisfaction. Almost, we are now adopting DevOps as culture for more fast, efficient and reliable software delivery.
Here, are some DevOps features:
DevOps consists of 5 C’s which gives high productivity, less bugs, enhanced and communication. Probably, it provides quick way to resolve issues, more reliable and much more. The 5 C’s of DevOps are:
Since, the name sounds as microservices becomes an architectural way to develop the complex applications. So, it has the ability to create smaller modules through division. Precisely, Microservices can help the developers to decide how to use, design, which language to choose and platform to run and deploy.
Some advantages of microservices:
Although, containers create virtual environment, allows to run multiple application or OS without interruption. Another, container which one can deploy the application quickly and consistently. Because, the containers have their own CPU, memory, network resources and block I/O. Therefore, it shares with the kernel of host operating system. Thus, lightweight can run directly within host machine. So, you will find some advantages of Containers presented below:
Due to, the automation, arrangement, coordination and management of containers is container orchestration. Finally, various features of container orchestration include:
Also, the task of a developer limits to launch a cluster of container instances. Surely, it allots the tasks which requires to run. Yet, the management of all the containers perform the tasks through orchestration.
It allows the developer to define the task where they require to specify the number of containers. Therefore, they fulfill the task and the dependencies. Moreover, one task can launch through single task definition.
Although, simple API calls now you can register and de-register tasks, launch and stop Docker containers.
Seems like, load balancing actually helps in distributing traffic across the containers or deployment.
In addition, you can now monitor your CPU and memory usage of the running tasks. Hence, it also gets notified if scaling requires through containers. Consequently, some tools used for container orchestration (both paid and open source) are Kubernetes, Docker Swan, Google Containers and Microsoft Containers. Precisely, it becomes clear now and evident that 2017 is going to face a lot more changes, new and innovative ways for DevOps.
Saima Naz
Jul 25, 2017

Some Extremely Useful PHP Tools
PHP is one of the most popular open-source scripting languages used for server-side web development. It powers major websites like Facebook, WordPress, and many more. It provides some good reasons why developers prefer PHP over other server-side scripting languages, such as Ruby, Python, etc.
PHP is considered a very fast language. It has detailed documentation, a large community, ready-to-use scripts, and supported frameworks. Teams working with professional Software Development Services rely on the right PHP tools to make the development process easy, effective, and quicker.
Here, I am going to present some useful PHP tools that can significantly improve the whole development process.
Key Takeaways:
Specifically, Webgrind is known as a debugging tool. It provides an Xdebug profiling web front end in PHP 5. It can be installed in seconds and works on all platforms.
Xdebug is a popular PHP debugging tool. Specifically, it helps provide lots of useful data to quickly identify bugs in the source code. The tool can easily plug into almost every popular PHP application like PHPEclipse and PHPDesigner.
PHPUnit is a complete port of JUnit. This tool helps to test the web application’s stability and adaptability. So, it can write test cases within the PHPUnit framework with easy usage.
The tool allows writing automatic web application UI tests in any programming language. It works against any HTTP website that uses any mainstream JavaScript-enabled browser. Hence, the tool can be used in combination with PHPUnit to create and run automated tests within the web browser.
PHPDocumentor
PHPDocumentor, aka Phpdoc or Phpdocu, provides a great documentation tool for PHP code. It contains numerous features such as the ability to produce results in HTML, PDF, CHM, and XML DocBook formats. So, it serves both web-based and command-line interfaces along with source code highlighting.
Securimage tool serves as a free and open-source PHP CAPTCHA script. It generates complex, difficult images and CAPTCHA codes to give extra protection to your forms.
Pixy is a Java program that automatically scans PHP 4 source code to detect XSS and SQL injection possibilities. The tool takes a PHP program as an input and lists all the possible vulnerabilities found in the code. It supports important additional information to help in understanding the vulnerability.
It is one of the powerful PHP tools that lets you create attractive web charts. The graphs are served from dynamic data, and one can make use of PHP scripts to generate and collect data from databases. Then, it makes use of this tool to create Flash (SWF) charts and graphs.
PHPMathPublisher provides great services as a tool. It can edit mathematical documents on the web using a PHP script. However, it needs no additional LaTeX programs on the server or MathML.
Here, PHP Object Generator serves as a great tool. It provides an open-source web-based tool that helps you quickly construct PHP objects. Also, it utilizes OOP (object-oriented programming) principles in the code.
Another open-source tool is Scavenger, a vulnerability detection tool. The tool helps to react to exposure findings and track vulnerability findings. It also reviews accepted and false-positive answered vulnerabilities.
The tool MagickWand also serves PHP. It means a PHP module suite to work with the ImageMagick API. You will find it helpful to create, edit, and compose bitmap images. So, the tool supports very easy functions and quickly incorporates image-editing features in PHP applications.
The PHP CodeBeautifier tool saves you time by formatting the code to present it in your own way. Specifically, the GUI version allows processing files visually. A command-line version can also integrate with other tools. It can also be used as an integrated tool of PHPEdit.
PHP continues to be a powerful choice for web application development, and the right set of tools can go a long way in improving the efficiency of the development process. Whether it is debugging, testing, documenting, securing, or optimizing code, these tools help developers create more reliable and maintainable applications. Why settle for average when Arpatech gives you an experienced PHP team dedicated to building web applications that are secure, scalable, and built to last? Let’s get to work.
Saima Naz
Jul 10, 2017


Before we begin, please solve this quick math check to confirm you're human, and you'll be all set to start chatting with our AI assistant.
Stay connected with us to receive the latest information, updates, and insights from our world of innovation.
By entering your email address you will receive promotional updates.


© 2026 ARPATECH (ADVANCED RESEARCH PROJECTS & TECHNOLOGY)